Dial Setup – Windows 98
The following are step-by-step instructions for configuring Dial-Up Networking in Windows 98 and Windows 98 Special Edition for use with the Access US dial-up network.
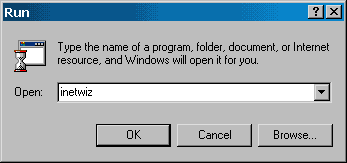
- On the main desktop, click on the Start button, and then choose Run.
- Type in inetwiz and then click on OK or hit Enter.
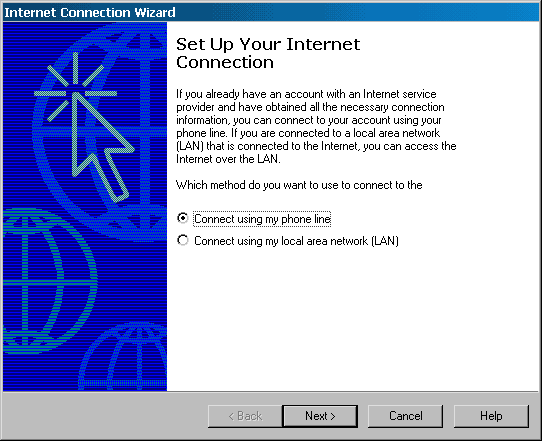
- Select Connect Using My Phone Line and then click Next.
- If you are prompted to select a modem, choose the modem you wish to use to connect to Access U.S. Then click Next.
If this screen does not appear, you only have one modem installed so there was no need for you to pick one. Continue to the next step.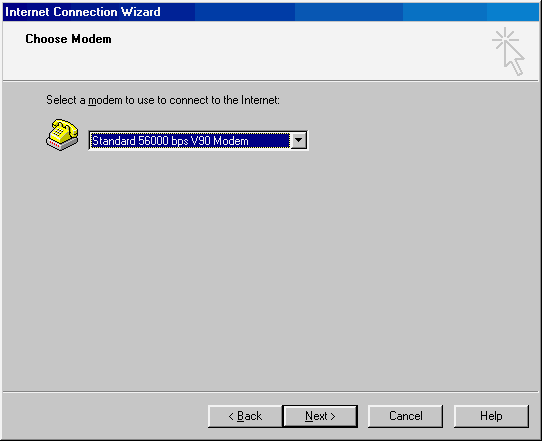
- If prompted to create a new dial-up connection or use an existing dial-up connection, select Create a New Dial-Up Connection.
Click Next.
Note: If this screen does not appear, you do not have any connections created and Windows knows you have to create a new connection, so it skips this step. Proceed to the next step.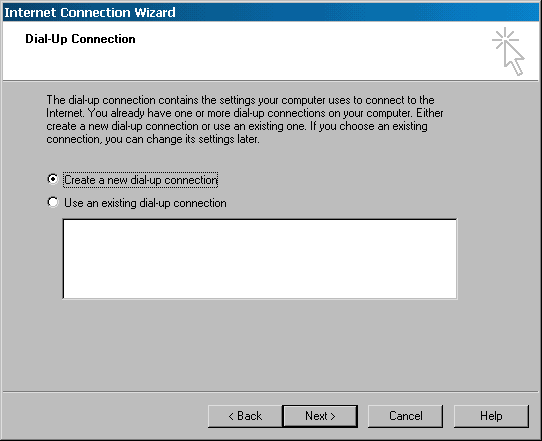
- Enter your area code in the Area Code: field.
In the Telephone Number: field, enter your Local Access Number that was given to you. If you do not have that number, look up your access number on our Local Access Dialups webpage.
Once the local access number has been entered, click the Advanced… button.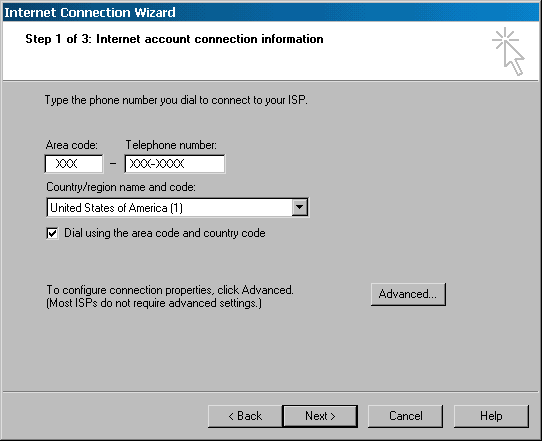
- On the Connection tab, select PPP (Point to Point Protocol) as the “Connection type.” Make sure Logon Procedure is set to None.
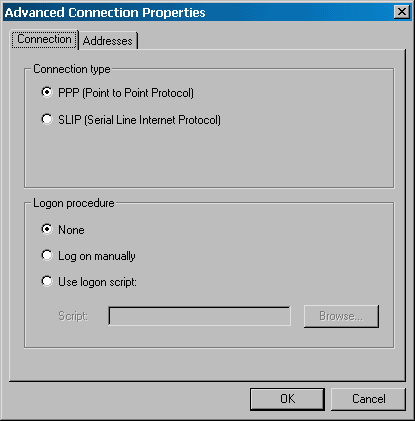
- Then click the Addresses tab at the top.
Under the IP Address section, select Internet Service Automatically Provides One. Under the DNS Server Address click on My ISP Automatically Provides A Domain Name Server (DNS) Address..
When that information is entered, click OK, and then click Next.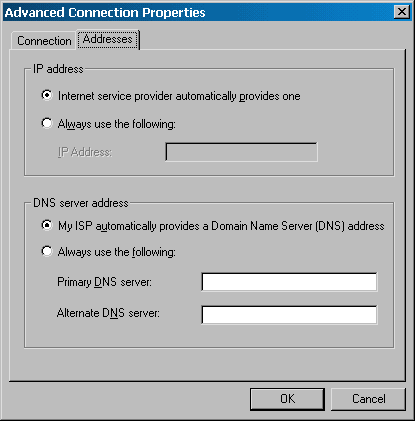
- In the User Name: field, enter your user name (your username is the same as your full e-mail address, for example username@accessus.net) using only lowercase letters.
In the Password: field, enter your password.
Then click Next.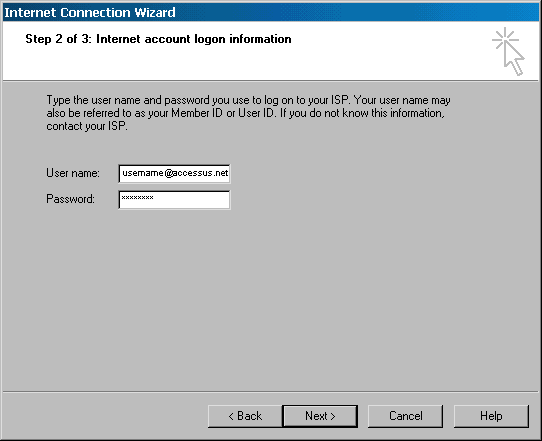
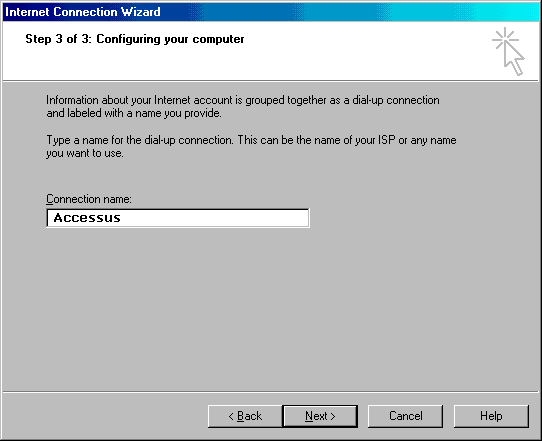
- For the Connection Name, change the name from Connection To xxx-xxxx (where xxx-xxxx is the access number) to AccessUS or something that would help you to easily remember what that connection is for. Then click Next.
- If you wish to set up Microsoft Outlook Express for e-mail, select Yes and click Next.
If you do not wish to set up Microsoft Outlook Express, then select No instead, and skip to Step 17.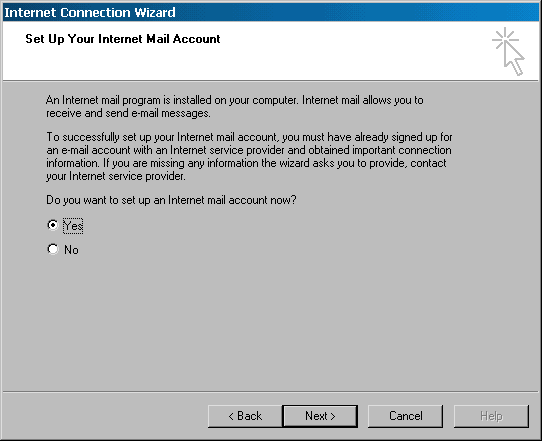
- If prompted to create a new Internet mail account or use an existing acount, select Create a New Internet mail account. Click Next.
If you do not have this screen, you do not have any Internet mail profiles set up yet so Windows knows you have to create a new account. Proceed to the next step.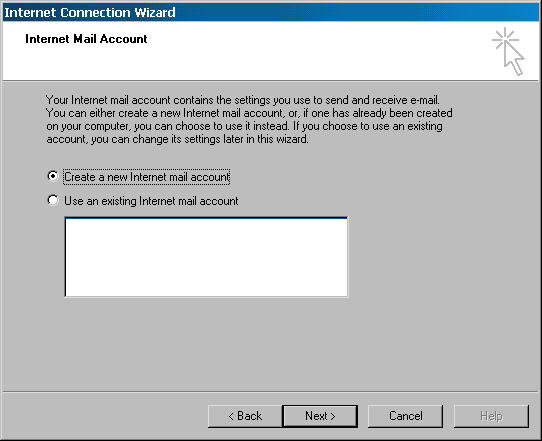
- In Display Name, type in your name as you would like it to appear on all outgoing messages.
Click Next.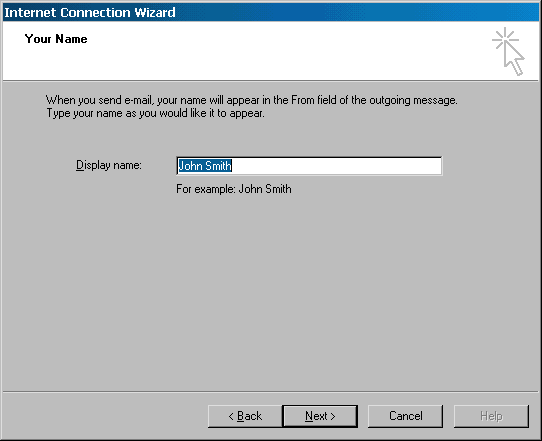
- In E-mail Address: type in username@accessus.net Replace username with your user ID.
Click Next.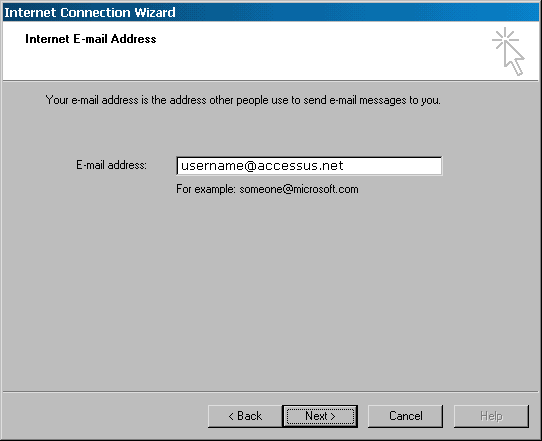
- For Incoming mail (POP3 or IMAP) Server: enter mail.accessus.net.
For Outgoing mail (SMTP) Server: enter mail.accessus.net
Once that information is entered, click Next.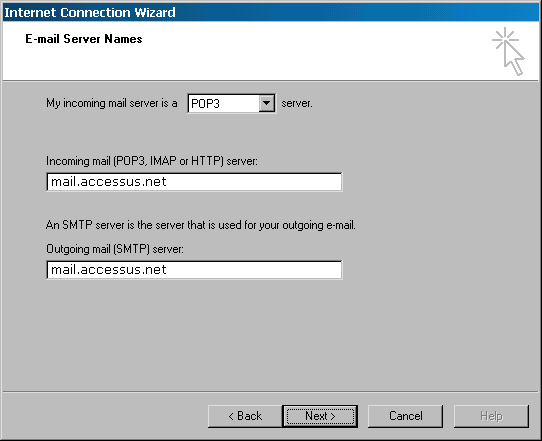
- For Account Name: enter your user ID (which is the same as your full email address) in all lowercase letters. Be sure to include the @accessus.net portion of your email address
For Password: enter your password.
Then click Next.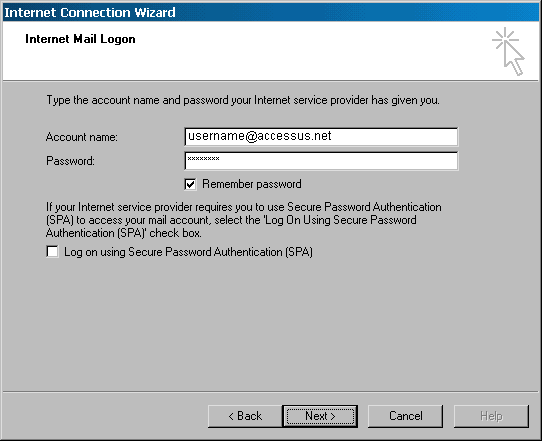
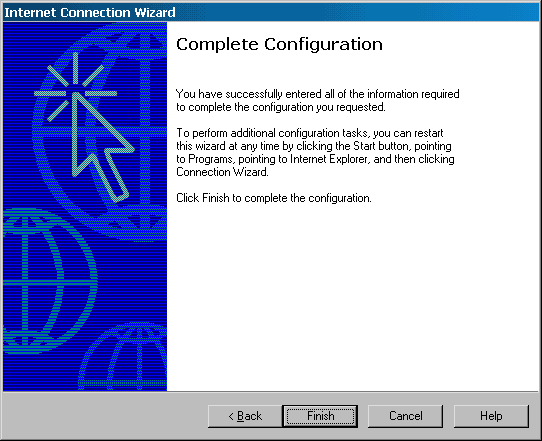
- On the final screen of the Setup Wizard, click Finish.
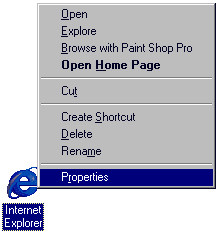
- Back at the desktop, click once with the right mouse button on the Internet Explorer icon on your desktop. From the pop-up menu, left click once on Properties.
- On the General tab, you can set your home page in the Address field. This is the page which will come up every time you connect to the Internet and start Internet Explorer. This can be any page on the Internet. If you would like to start with the Access US homepage, type http://www.accessus.net here.
Next click OK.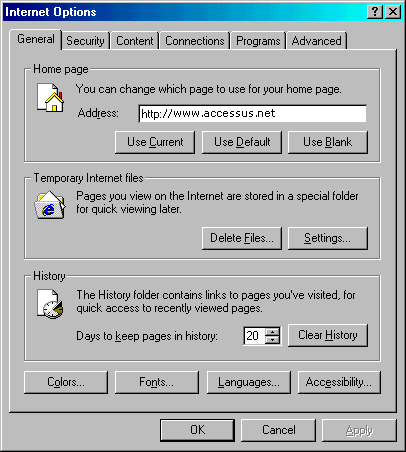
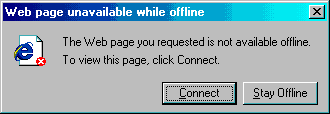
- To connect, double-click on the Internet Explorer icon on your desktop. If you see a dialog box which says Web Page Unavailable While Offline, click the Connect button. If not, proceed to the next step.
- Verify that your User Name is spelled correctly, is in all lowercase letters, and contains @accessus.net
Verify that you have a password of the proper length entered in the Password field.
Next click Connect.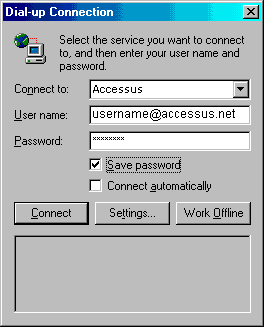
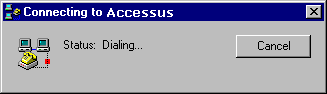
- The modem status will appear in the next box, proceeding through Initializing Modem, Dialing, Verifying User Name and Password and Logging on to Network. At any time you can abort this procedure by pressing Cancel.